Thursday, November 27, 2008
Cornered: A Write Up About Cornering Lights
This person’s name is Don but his eBay alias is JDMISME. I highly suggest checking him and his auctions out.
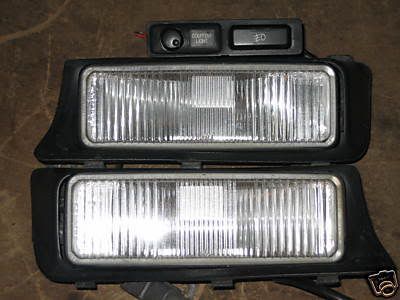
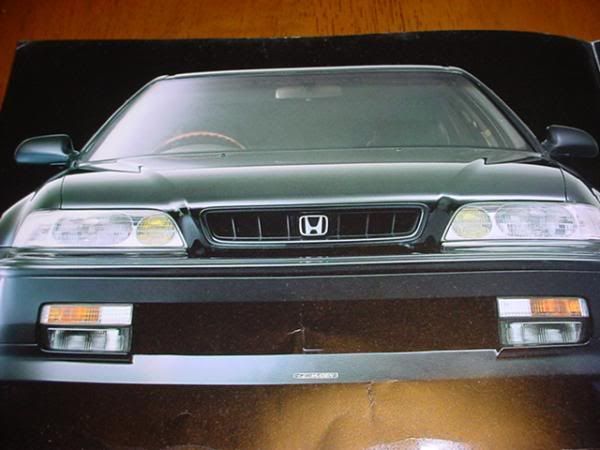
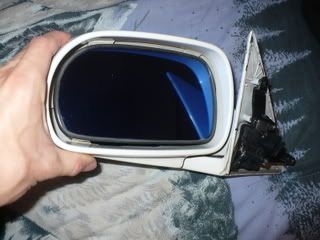
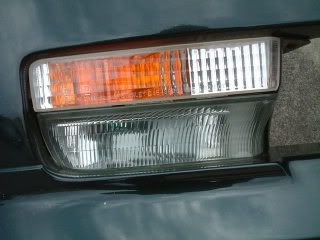
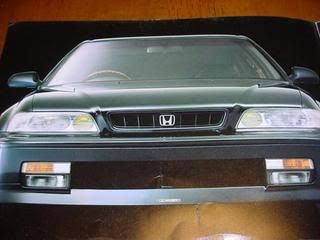
So corner lights. What are they? What applications were the made for? Well, as an option from Honda, corner lights were offered for Honda vehicles such as the CD/CE Series Accord, KA7 Legend, DB/DC Series Integra, 95-98 Odyssey and various others. The main difference between the individual vehicle sets are the plastic inserts/bezels that the lamps are attached to and then inserted into the bumper. Those are vehicle specific to match the exact contour of the different bumpers
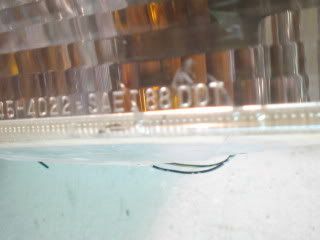
They look like this:
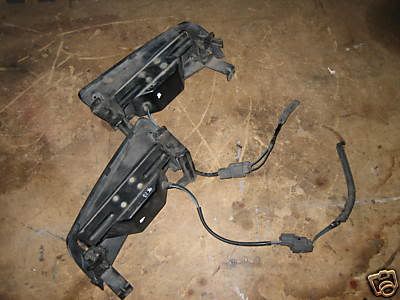
They work like this:
When your turn signals are turned on, the corresponding cornering light (right or left) will be illuminated to light up that side of the road in the direction that you are turning into. These are handy option items that help you when you're unsure of the road that you are traveling on. They can help to keep you from hitting unseen/unexpected road hazzards that normally would not be visible at night. The cornering lights stay on for as long as the turn signal is on and then they turn off about a second after the turn signals are turned off.
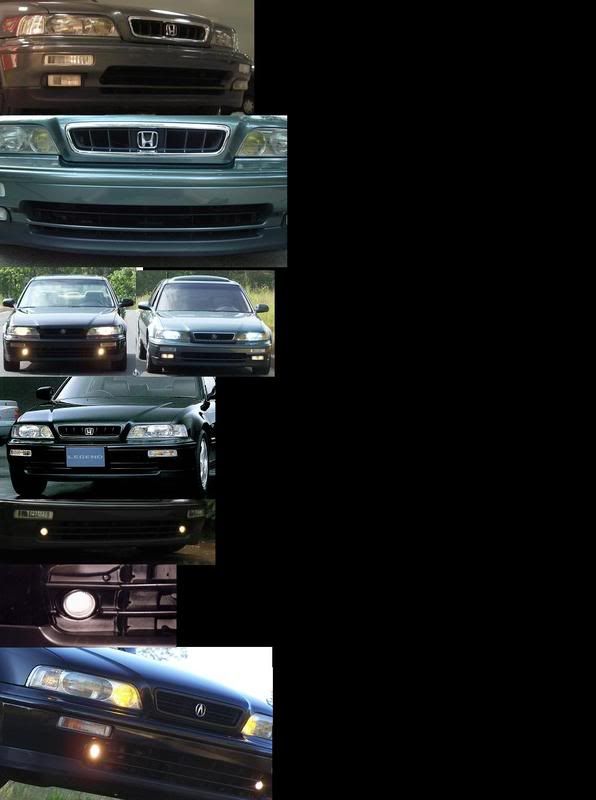
I’ve seen two different kinds used on Legends:
Kind of a squarer type if you look closely….
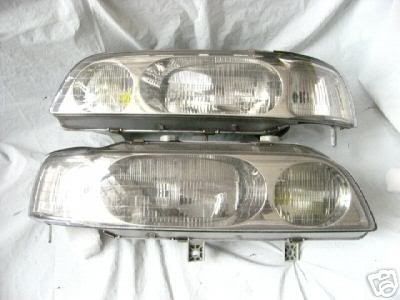
The other type looks like this…..
Currently the above type is listed on eBay with a Buy It Now price of $175.00 plus $12.00 shipping. A bit too pricy for me right now, but I imagine I’ll be getting a set or two before Project Legend is completed. I’m partial to the squarer version myself, but if a set like the ones above presented themselves at a decent price, I would definitely not turn them down.
So that’s Novembers second blog posting. It seems that since this blogs inception, I’m really only posting once or twice a month. I intend to change that infrequency for the better however.
I have recently began employment with an amazing car shop and as a result, I now can afford to begin some serious Project Legend undertakings. Because of that, I ideally won’t have to just post about stuff I see on eBay that I can’t afford. I should be able to begin to write and update posts with process updates as well as “How-To’s” that visually document varying modifications and upgrades.
So until then, stay tuned. More coming soon. Hopefully REAL soon.
Project Legend continues……
Sunday, November 2, 2008
Importation Information as a Forum Response
http://www.acura-legend.com/vbulletin/f4/jdm-drooling-why-doesnt-someone-130010/
I wrote this. Its the most I've written in awhile so I thought I'd start it off as Novembers first blog posting...
*ahem*
Why DOESN'T someone import a RHD Legend. Be it from the UK or the Legend's motherland; Japan. I know what’s holding me back; and that is money. But I fully intend to. When? I'm not sure yet. But I'll do it. I'd like to be the first KA7 owner to successfully swap a 6-speed into a RHD Legend. But I'd also like to see other people do it. So much so that if someone did before me, I'd just be that much more motivated to do the same thing too. It’s not impossible. As anyone here who has been following the Korean Turbo and Supercharged thread can attest, nothing is impossible and there is way more potential in our cars that has yet to be tapped. However it takes initiative.
Like many things in life, all it takes is for one person to do it, say "hey everybody, this is how its done" and others will follow. Just look to people like Christian aka DV8. How long ago did he successfully swap a 3.5 in to a KA7, and now look at how many members have done it or in the process of doing it. Sure, swapping out a higher displacement engine and importing a RHD version of our car isn't exactly the same thing, but you get what I'm saying.
Importing a RHD isn't an easy process. It never has been. But it’s a hell of a lot easier now than it was ten years ago. If you take the time to research it, price it out, adjust your expenses to afford it, find a trust worthy enough DOT certified RI (Registered Importer) to do business with, and are patient enough to have a car shipped to you and then quite possibly and most likely have it sit there undriveable until you sort through all the red tape to get it legal......it is very possible.
Is it costly? Yep. Is it worth it to drive around on the opposite side of a car? Yeah. I think so.
But that's just my opinion. I'm sure there are plenty of people or even members of this forum who just don't see the value in it or don't think it’s worth the hassle. However I'm sure that some of those same people might just change there minds if someone did it successfully and documented it here on the forums though.
I guess I'm just tired of opening up Honda Tuning every month and seeing the same old Civic, Integra, Civic, (and maybe an) S2000 featured articles. And not just Honda Tuning, but all the other magazines or articles that I read. I want to see innovation. I want to see a car that I can relate to that I drive in......up in a magazine article......or on the cover. To do this, however, is probably going to take just that much extra effort that importing a RHD or at least a front clip and converting it, WOULD take.
Ok...I'll finish up my little soap box rant here...but the title of this thread just popped out at me tonight and I've been wanting to see a RHD Legend over here on US soil for so long, that I just had to say something.
I'll end this by saying that "where’s there is a will, there is a way" and if importing a RHD car was easy, it (like so many other things in life) probably wouldn't be worth it. Just because it hasn't been done, doesn't mean that it can't be done. There ARE ways to do it. There ARE problems you WILL run into. It WILL be challenging. But then again...that's what I love most about owning and modifying a Legend; the challenge.
Friday, October 17, 2008
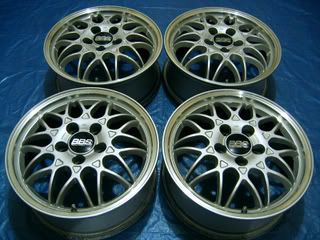
JDM Honda BBS.....No BS
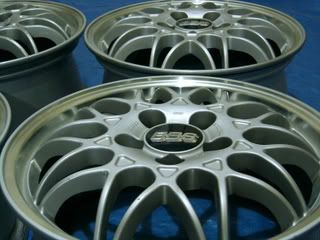
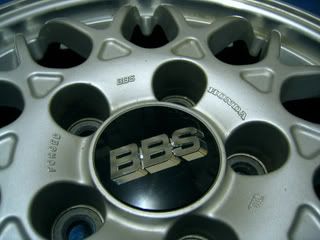
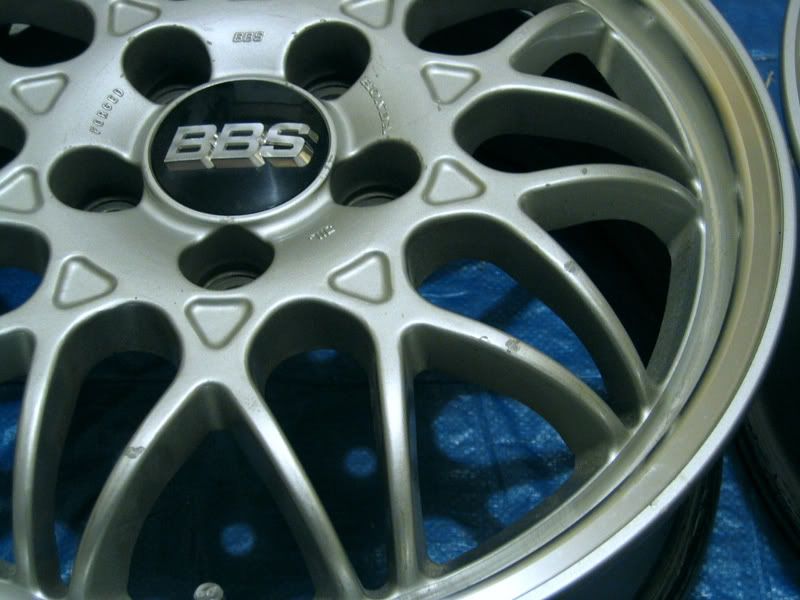
Wow…so there I was, scrolling through eBay and I came across these wheels being listed…..
“Auction is for a beautiful set of four (4) authentic JDM Honda BBS RG-II alloy wheels. These lightweight forged BBS alloys were exclusively made for Honda for their Japanese KA7/9 Legend. Take a look at the wheel face and you know these are not general BBS RG's. These wheels bearing Honda logo are hub-centric for use on the Legend and they use Honda OEM bulge-type lug nuts.”
Crazy, right? I never knew BBS made wheels specifically for Honda, much less the KA7/8/9 chassis!
Here’s a little more about BBS taken quite literally…..directly from their website.
http://www.bbs-usa.com/
*ahem*
“BBS is synonymous with top-quality wheels. But what makes BBS the best is not just elegant, stylish designs. It’s what you don’t see that makes our wheels the most sought-after and respected in the world.
The wheel has been around for thousands of years, but that doesn’t keep us from reinventing it all over again.
BBS got its start in the 1970s when it began producing wheels for touring car racing. It quickly became a widely recognized name in the world of motorsports because of its ability to produce race-winning wheels that compromised neither integrity nor weight. Over the years, we’ve developed and perfected various technologies used in the production of BBS wheels that have effectively set us apart from our competitors, on and off the racetrack.
Unlike standard wheel manufacturing processes—which have a limit to the level of performance they can deliver at a specific weight—BBS Flow Forming and Forging processes make it possible to manufacture solidly-engineered wheels that are also lightweight. Plus, the BBS commitment to quality, performance, and safety goes far beyond other recognized standards such as the German TUV, or the Japanese JWL / VIA requirements. In some cases the BBS standard is 10 times greater. Building wheels that are lighter and stronger requires a higher level of engineering, better manufacturing technologies, and a well-trained production staff.
Flow Forming
Flow Forming is a production procedure that turns the wheel (or rim section) over a special mandrel and three hydraulic rollers using tremendous pressure. The pressure and turning then force the rim area to form against the mandrel, creating the shape and width of the rim. During Flow Forming, the rim actually "flows” down to create the full rim width.
Less weight is key to record-breaking speed.
________________________________________________
Forging
In the past few years, “forged” has become quite a popular term in the aftermarket wheel industry—but not all forged wheels are created equally, just as not all cast wheels are created equally.
When the goal is ultimate performance, only a BBS forged wheel will do.
The BBS forging process requires up to 16 million pounds of pressure, and a multi-stage forging process. Starting from a billet of 6,000 Series Aluminum, or a special Magnesium alloy, every stage of production is optimized to create the best forged wheel in the industry—so it’s no wonder why BBS supplies wheels for today’s supercars more than any other company.
The forging process used to make our aftermarket wheels is the same process we use to make our Formula 1 wheels and Original Equipment forged wheels used on the Porsche Carrera, Ferrari 360 Stradale, Ford GT, and a variety of other high-performance and luxury vehicles.
BBS forged wheels have style and substance.
Light weight wheels deliver better performance, but lighter wheels—without compromised reliability—are not as easily achieved as many companies would have you believe. The aftermarket wheel industry has been flooded with products promising light weight—however they are not always strong enough to survive in the real world. BBS forged wheels are not only light, they’ve been designed to handle all environments gracefully and safely.
Why is Flow Forming such a big deal? Because during Flow Forming, pressure applied to the cast rim actually changes its mechanical properties, so its strength and impact values become similar to those of a forged rim. That translates to up to 15% less weight when compared to a standard cast wheel.
BBS currently uses Flow Forming in the production of CH and RC one-piece wheels, and for the rim sections of the RXII, RKII, RSII, and RWII multi-piece wheels.”
So that’s it pretty much. I’m pretty stoked on those BBS wheels, I can’t afford them, but I’m psyched that they made these for my car and I found out something new.
Friday, October 3, 2008
Illumination Thru Fog: 91-93 vs. 94-95
Well, in a previous post I alluded to the fact that I was moving. Since then, I have moved and along with me came everything that I have amassed over the years for Project Legend as well.
Along with all my current possessions that I have yet to install and wire up, there is also the never ending search for the parts or “pieces to the puzzle” that I don’t have. A significant piece happened to pop up on eBay while I was in the final days of getting prepared to move. This same eBay auction also happened to end while I was going to be driving, therefore leaving me unable to bid on it. Well, the auction ended and I did not bid on it, nor would I have because it went well beyond my price range.
Call me crazy, but $270.00 for some OEM fog lights is just too much. Well, maybe not for some people but for me, during this time of economic instability, it sure was.
As much as I hated to see the fog lights slip through my fingers, there may be a silver lining in those clouds after all. I’ll get to that (don’t you worry) but before I do, I’d like to talk a little bit about the fog lights and why they probably went for as much as they did.
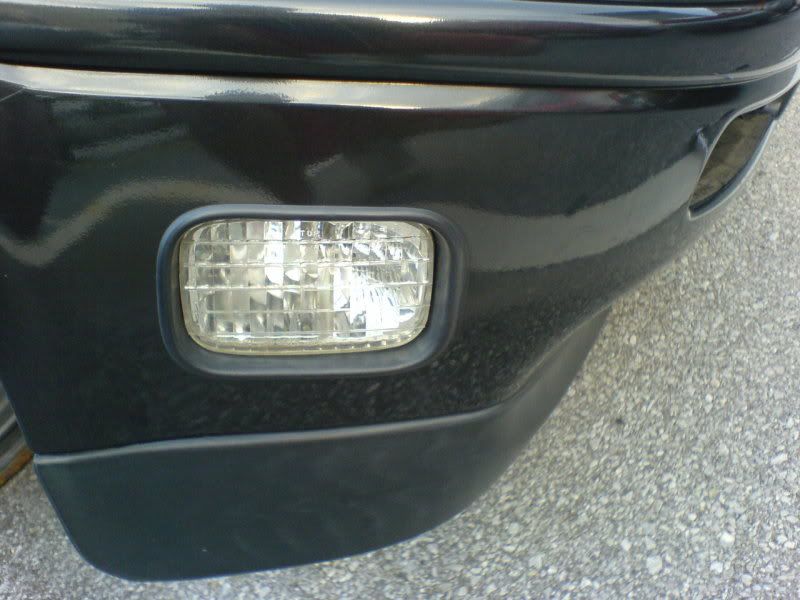
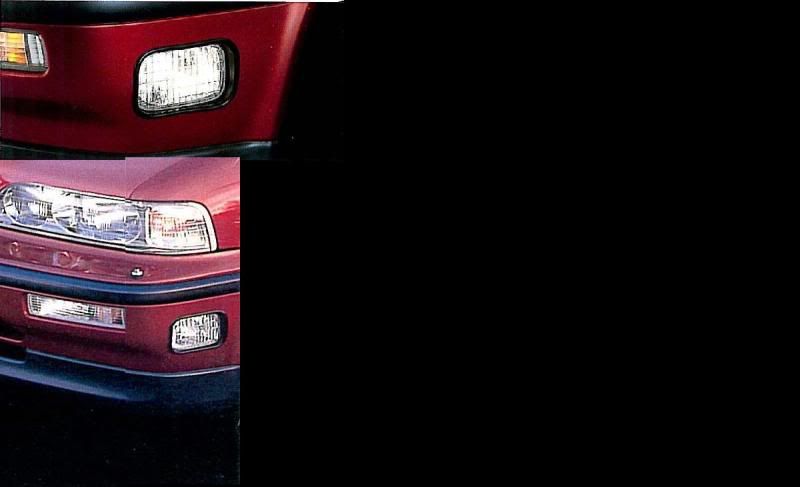
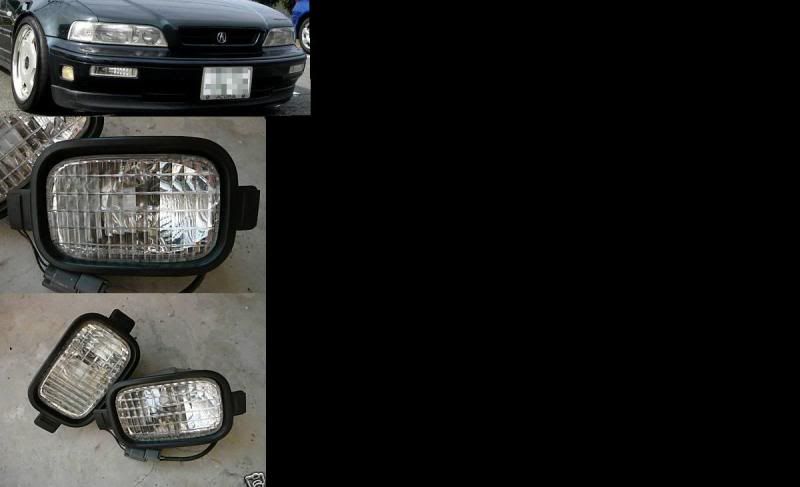
First off, some images of the fog lights that were posted:
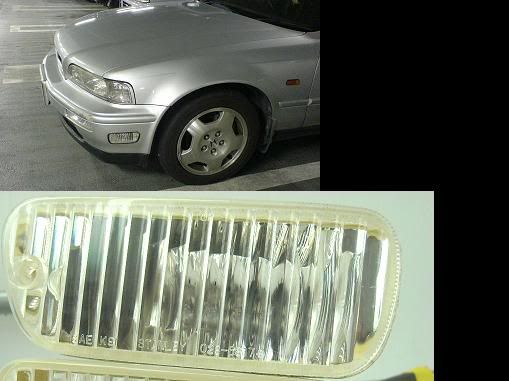
And now, some images of the two separate OEM bumpers and there respective fog lights:
As you can see, there are two types; the rectangular and the circular.
The rectangular fog lights and the bumper that allows for them is specific to the production years of 1991-1993, while the circular fog lights and there respective bumpers that allow for them are specific to the final two years of production; 1994 and 1995.
While both of these OEM fog lights, as well as there wiring (and even there switches!) are hard to come by, I believe the rectangular 91-93’s to be even more so. In all of my searches, I’ve only come across a few. I should also state that the few that I did come across were in very poor condition. With that being said, it’s not hard to understand why the fog lights that were being bid upon on eBay went for as much as they did.
Still, $270.00 is a bit much. In comparison I only paid $250.00 for my JDM one piece headlights from
Ok, now for the silver lining: two days ago as I was about to board the Bay Area Rapid Transit train to San Francisco, I noticed a parked Magenta painted Legend with those same 91-93 OEM rectangular headlights installed! Like a kid in a candy store, I ran up and got on my hands and knees while eyeing them up and down. To my delight they were in excellent condition. The Legend however, was not. First off, it was painted a rather hideous shade of pink and many of its parts were in various states of decay. So upon arrival back into my new home in
Hopefully he’ll be into it. Hopefully he won’t know that they are worth (apparently $270.00) and hopefully, by this time next week, I will have in my possession, a slightly used pair of OEM Stanley produced 91-93 fog lights for a fraction of what I would have gotten them for had I usually done what I do; sniping to win an auction on impulse when I really should have saved the money.
However, even if that doesn’t pan out, I guess I’ll just have to hold out for the Mugen bumper and its respective fog lights:
Saturday, September 20, 2008
JDM x Euro Collabo's?
Thursday, September 4, 2008
In Japan they call them “Blinkers”…..
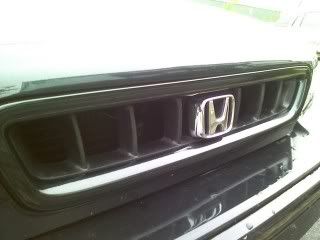
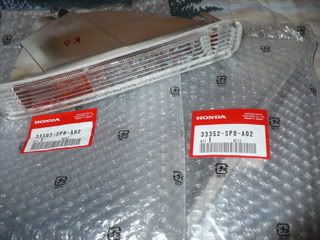
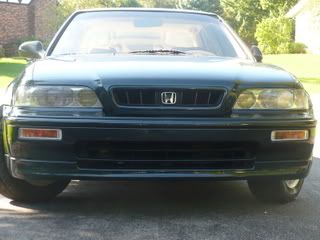
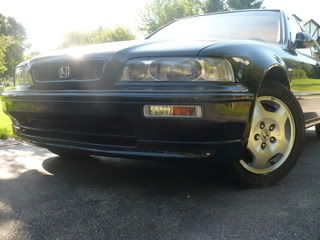
After a text to my in-guy at the local Acura Dealership about pricing info, I received a text back with the somewhat egregious price $130.00. Steep, yes, but justifiable I though, because along with the JDM 1-pieces looking hell fresh as well as in conjunction with the Alpha Touring “H” badged grill:
I just couldn’t take away from a clean OEM front end by installing anything less.
Could I ADD to my front end by installing anything more like the Mugen bumper however?
Yes, but until I come across another Mugen front bumper, I was going to have to settle for just new OEM turn signals.
Back to the story. Ok, so I told my guy “bet” and a week later he told me that they were in.
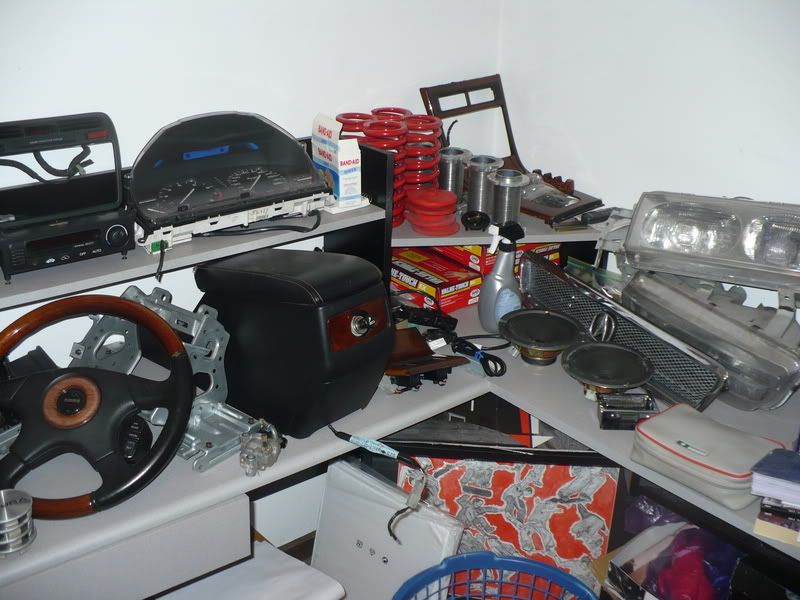
Brand spanking’ new in some bubble wrap. (Oh, and notice how the parts sticker says “Honda”. Because that’s what my car is; a Honda.) So that was about a month ago, and when I got them, I placed them on my “all-things-Project-Legend-that-have-not-yet-actually-been-installed” desk.
That is until last week, when I finally had some spare time and actually took advantage/initiative of that spare time to go about installing them. I toyed with the idea of taking out the amber interior lens before doing so, however.
How so you ask? Well, this is done by baking the lens assemblies themselves in an oven, there by melting the adhesive of the lens’s front portion and by doing so; allowing access to the interior portion of the lens. This is the separate amber plastic piece that covers the bulb and causes the actual amber luminescent color. Some people do this, and it looks good honestly, but after dwelling on it for awhile, I decided to leave it as is; OEM.
Well, they went in a little tough, but they are in and I’m pretty happy with the look.
Friday, August 15, 2008
Plight of the Navigator Part III
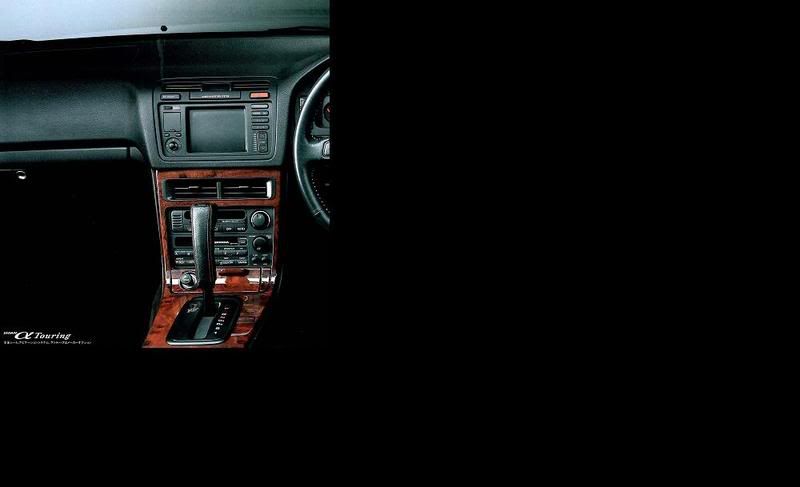
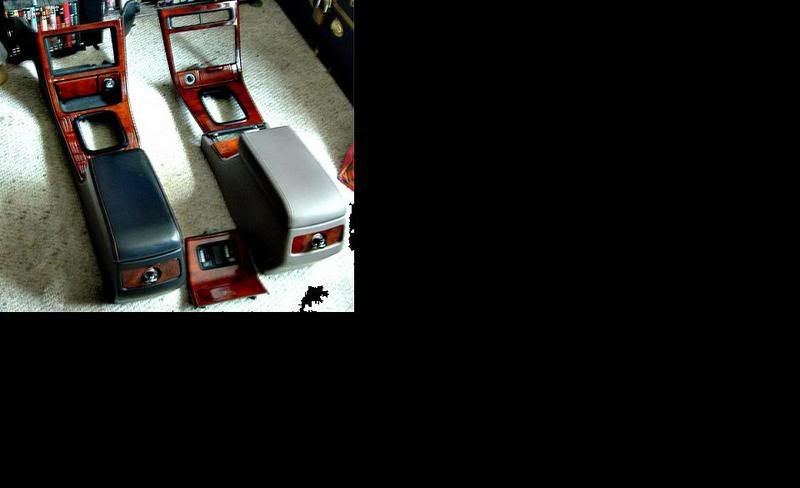
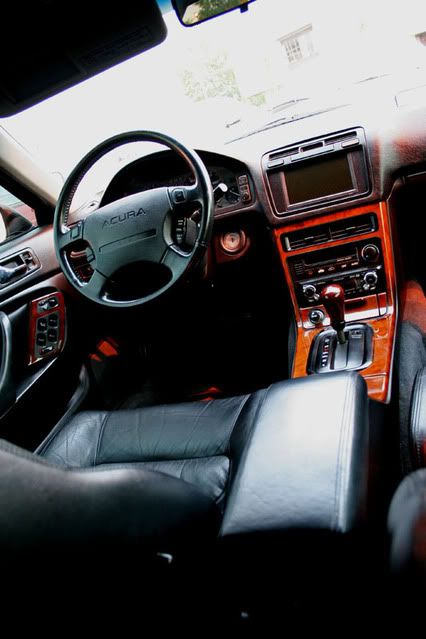
To the best of my knowledge, the Japanese domestic market was the only market to bestow an optional navigation trimmed center console upon the KA7/8’s chassis.
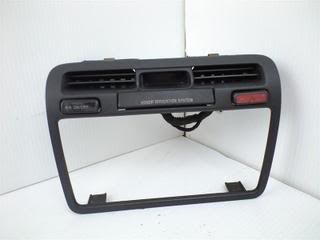
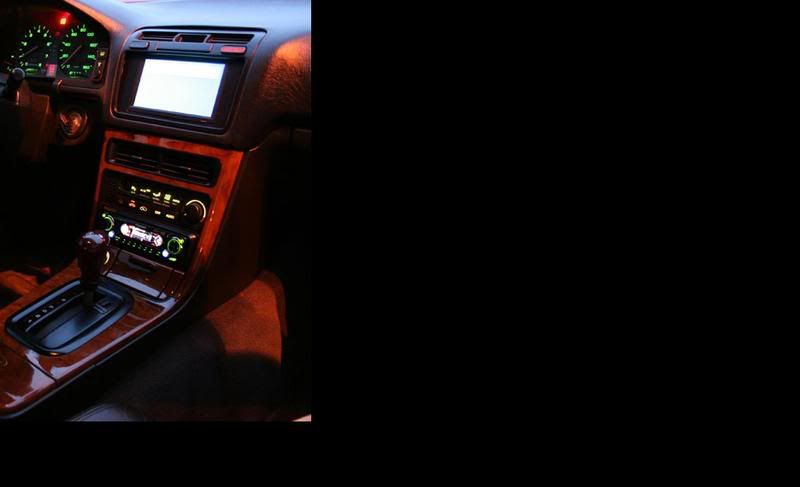
Because the space required for the navigational monitor and controls takes up most of the space in the center position of the dash, the climate controls were moved to the lower portion above the audio controls and the air vents were compressed to fit
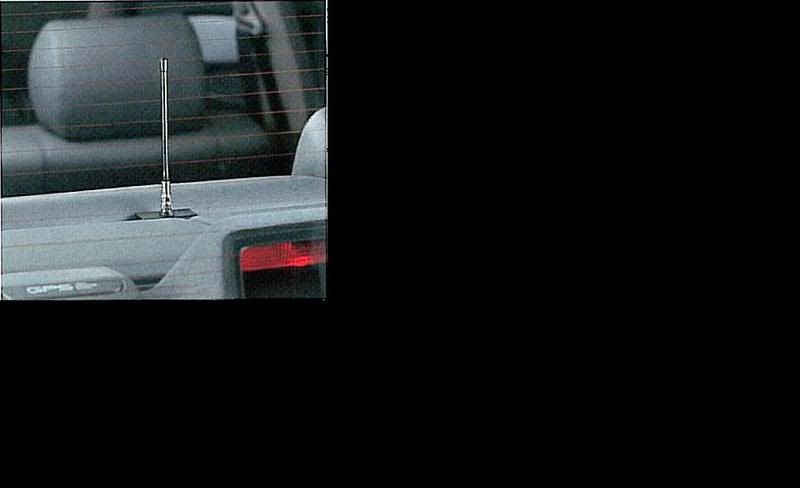
A separate GPS antenna for this system is then located on the rear dash of the vehicle
(The GPS is in a small box entitled “GPS” in the bottom left corner of the pic, the other antenna is for a factory option remote start system….which I’m not going to get into until a future post)
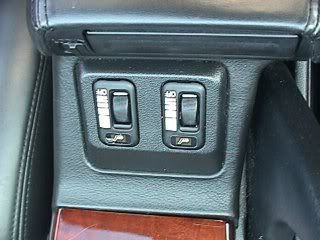
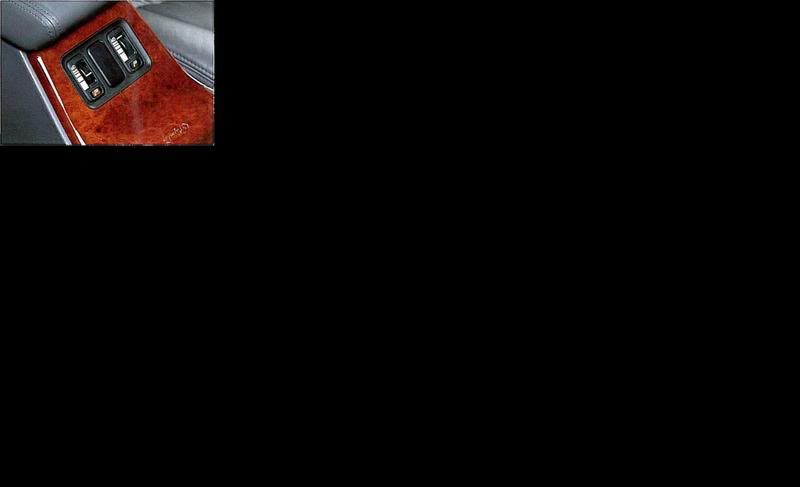
As for the heated seat switches, all of the domestic Markets offered them, but only the USDM center consoles had them sans wood grain garnish.
Wherareas the EDM and JDM center consoles did have a wood garnish.
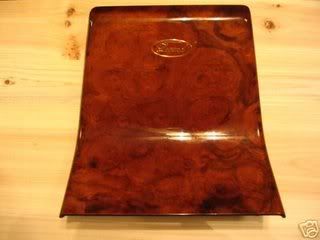
Or even if they didn’t have the heated seat options with controls….they usually still came with the Gold Etched “Legend” woodgrain garnish….
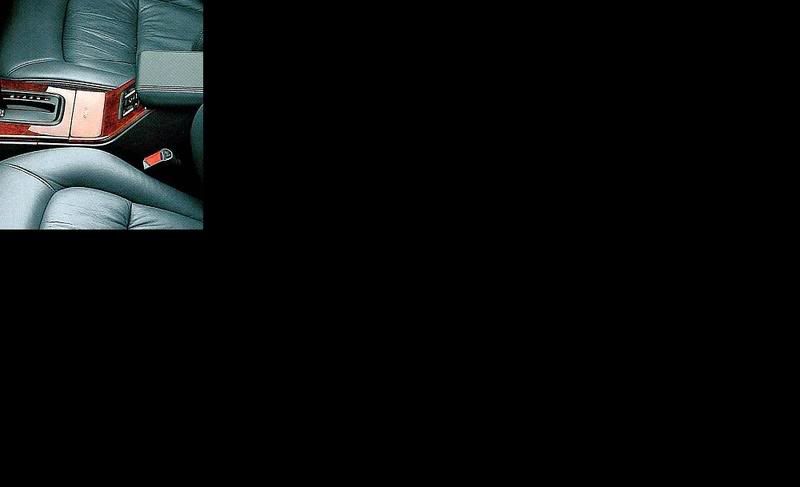
This brings up the major difference between center consoles in relation to all of Honda’s offerings for each specific market, i.e. e-brake equipped vs. foot brake equipped. All USDM KA7’s are LHD (left Hand Drive) therefore have an emergency hand break mechanisms and levers located directly to the right of the driver’s seat that protrudes ort of a designated slot area next to the shifter. In Contrast, all EDM & JDM legends are RHD (Right Hand Drive) and come equipped with foot operated parking brakes. As well as hand operated break release levers located under the steering column on the dash board. The Heated seat controls on all USDM center consoles protrude out of a rather unsightly plastic trim piece
Whereas the JDM & EDM center consoles had there heated seat knobs/controls incorporated to sit flush in an optional matching wood grain trim piece
Continued in a later blog….
Friday, July 4, 2008
Plight of the Navigator: Part II
However, I’m also (at times) very disappointed with the ignorance or “holier-than-thou” attitudes involved with many of the members of these forums/sites and don’t always feel like arguing on subjects that I feel passionately about, i.e. Honda’s or Legends specifically.
So what is the solution? Why, ProjectLegend.blogspot.com, obviously. This really is the beauty of the internet. I can say whatever I like, write about whatever I want, and post whatever I choose too. I’m my own moderator. It’s nice. I quite like it. If your feeling whatever it is I have to say, feel free to get at me: alphatouringlegend@gmail.com. If you’re not feeling it……well, there are always the forums. I can see the thread now: “That dude Synopsys Who Writes That Project Legend Blog Is A Total Douchbag!”
Ha! Its all good though. Everyone is entitled to there own opinion just as I am mine.
Okay, enough random rants from some dude who writes a blog. On to the center console blog. *ahem*
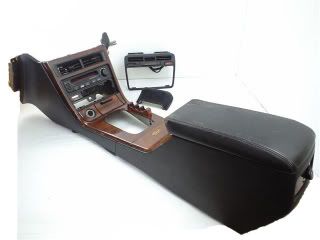
Well, as I mentioned in my last post, I recently purchased a slightly used JDM center console from my man Don (i.e. JDMISME via eBay……go buy stuff from him) and although I had a little trouble coming up with the funds at first, it is indeed paid for and hopefully on its way. Its coming with all the brackets, trim, and wiring needed to do a proper swap into a USDM. What he didn’t send was the JDM radio/tape player and navigation innards but that’s ok. I wasn’t planning on using them anyways. I currently am in possession of an Alpine DVA-9860 head unit and intend on using that in conjunction with an as-of-yet-not-quite-purchased monitor to be placed/retro fitted in the navigation trim area.
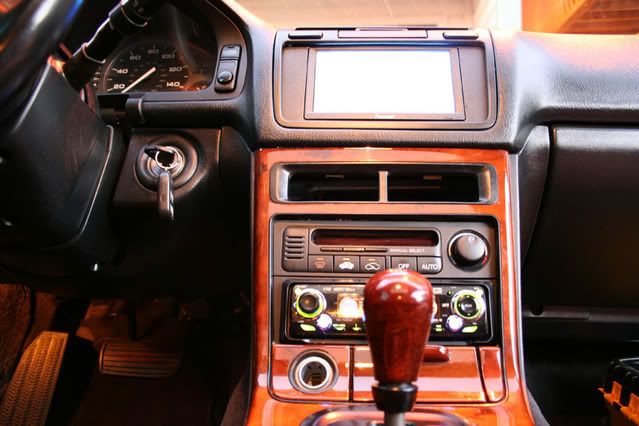
So it’ll kind of look like this……
Or this…..
However, depending on what screen I get, it should be a little longer in width so as to fill up the trim area properly.
This conversion has been done more than a few times in the US and when executed properly; looks amazing.
In my next post, you will hear what I have to say about the difference in domestic markets and there relation to center consoles in regards to Project Legend and KA7s.
Stay tuned.....I might actually blog more than twice a month this time.
Tuesday, June 24, 2008
Plight of the Navigator
THAT kind of stuff. So I won the auction for a pretty decent price and that was...about a week ago. The difficulty in payment is due to having to deal with getting my daily driver running or to be specific, paying the man who made it all possible on top of buying a differential that I hadn't anticipated. Suffice to say that this week the item WILL be paid for and in two plus weeks, I WILL finally have a genuine alpha Touring Navigation trimmed center console for Project Legend.
I plan on going into the specifics on all the differences between USDM, JDM, EDM, and JDM w/Navigation center consoles in my next post, but until then....keep this in mind as a probable end result:
Tuesday, June 10, 2008
The Difference Betwen Differentials & Dismay Discussions
What is a differential and why would it be relative to the post? A differential is, well, I’ll let this Copy Paste Job from “How Stuff Works” .com explain it for me….
“This article will explain differentials -- where the power, in most cars, makes its last stop before spinning the wheels.
The differential has three jobs:
• To aim the engine power at the wheels
• To act as the final gear reduction in the vehicle, slowing the rotational speed of the transmission one final time before it hits the wheels
• To transmit the power to the wheels while allowing them to rotate at different speeds (This is the one that earned the differential its name.)
In this article, you'll learn why your car needs a differential, how it works and what its shortcomings are. We'll also look at several types of positraction, also known as limited slip differentials.
Why You Need a Differential
Car wheels spin at different speeds, especially when turning. Also note that the front wheels travel a different distance than the rear wheels. Each wheel travels a different distance through the turn, and that the inside wheels travel a shorter distance than the outside wheels. Since speed is equal to the distance traveled divided by the time it takes to go
For the non-driven wheels on your car -- the front wheels on a rear-wheel drive car, the back wheels on a front-wheel drive car -- this is not an issue. There is no connection between them, so they spin independently. But the driven wheels are linked together so that a single engine and transmission can turn both wheels. If your car did not have a differential, the wheels would have to be locked together, forced to spin at the same speed. This would make turning difficult and hard on your car: For the car to be able to turn, one tire would have to slip. With modern tires and concrete roads, a great deal of force is required to make a tire slip. That force would have to be transmitted through the axle from one wheel to another, putting a heavy strain on the axle components. “
So there you go. Got your learn on I hope.
Now as far as relativity, that previous info on differentials is relative to this post because as it turns out, the differential is what went out on my daily-driven KA7. Not the torque converter that both I and my trusted auto tech had thought.
Awesome. There goes another hundred dollars for a low mileage differential shipped as well as another 3-5 business days without my car. Not to mention a bit of a waste of money in respect to the two hundred plus spent on a low mileage JDM transmission that I didn’t need to buy after all.
Could be worse though.
While in this somewhat never ending transitional period of not having my whip, I have had plenty of time to put things in perspective and reflect on my goals, ambitions, and cold realities surrounding Project Legend.
For example, how am I going to incorporate my planned exodus from Wisconsin into power moves for Project Legend and its upgrades?
How feasible is it to maintain a daily driven luxury sedan that runs on Premium gasoline when gas prices are going nowhere but up?
How much sense does having not one, but two of these sedans in the long run, make?
How many of my planned modifications will make it onto my Daily Driver before my move vs. how many will just come along for the ride in boxes until I purchase the Blk on Blk Type II 6-Speed Sedan?
How much of a monetary investment do I intend to make in regards to a daily driven car that might just end up being passed along to another member of my family anyway?
Wouldn’t it just be easier to buy a Honda S2000 and focus on that?
What kind of horsepower am I going to be satisfied with when all is said and done?
How much is the culmination of ALL my plans, dreams, and aspirations for Project Legend going to cost me in the end in both time and money?
Is it all worth it?
How far should I go in regards to V.I.P. tuning?
How feasible is it to do a 3.5 swap if a Type II 6-speed is enough?
Will my car be safe where I live when I move out to California?
How much effort/money needs to be spent in order to be at least somewhat satisfied with the end result in regards to each aspect of the build?
How much of the work am I willing to do vs. paying someone else to do it for me?
How hard is all this custom fabricating going to be?
Ok….well, not so much perspective….but I am getting forced to come up with answers and solutions to some of the questions/problems previously listed.
More on that later. I’ve kind of got a lot on my plate people.
Sunday, May 25, 2008
Conversations and Conversions of Torque
I’m pretty sure it was my torque converter that went out, which is a costly repair to say the least. What is a torque converter you may ask?
Well, let me explain…
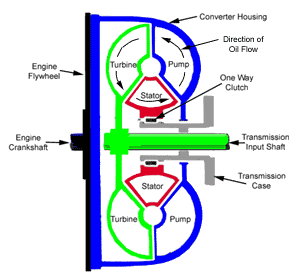
Torque Converter
On automatic transmissions, the torque converter takes the place of the clutch found on standard shift vehicles. It is there to allow the engine to continue running when the vehicle comes to a stop. The principle behind a torque converter is like taking a fan that is plugged into the wall and blowing air into another fan which is unplugged. If you grab the blade on the unplugged fan, you are able to hold it from turning but as soon as you let go, it will begin to speed up until it comes close to the speed of the powered fan. The difference with a torque converter is that instead of using air, it uses oil or transmission fluid, to be more precise.
A torque converter is a large doughnut shaped device (10" to 15" in diameter) that is mounted between the engine and the transmission. It consists of three internal elements that work together to transmit power to the transmission. The three elements of the torque converter are the Pump, the Turbine, and the Stator. The pump is mounted directly to the converter housing which in turn is bolted directly to the engine's crankshaft and turns at engine speed. The turbine is inside the housing and is connected directly to the input shaft of the transmission providing power to move the vehicle. The stator is mounted to a one-way clutch so that it can spin freely in one direction but not in the other. Each of the three elements have fins mounted in them to precisely direct the flow of oil through the converter
With the engine running, transmission fluid is pulled into the pump section and is pushed outward by centrifugal force until it reaches the turbine section which starts it turning. The fluid continues in a circular motion back towards the center of the turbine where it enters the stator. If the turbine is moving considerably slower than the pump, the fluid will make contact with the front of the stator fins which push the stator into the one way clutch and prevent it from turning. With the stator stopped, the fluid is directed by the stator fins to re-enter the pump at a "helping" angle providing a torque increase. As the speed of the turbine catches up with the pump, the fluid starts hitting the stator blades on the back-side causing the stator to turn in the same direction as the pump and turbine. As the speed increases, all three elements begin to turn at approximately the same speed.
So that’s what it is/does and without it working properly; my car is not working.
I was able to get it towed to my mans shop last Monday (finally) as well as acquire a low mileage JDM transmission complete with a working torque converter from a shop in Chicago. So basically my car, new/old transmission, and money are going to my man’s shop and there it well stay until he is able to fix it.
Needless to say, this is a bit of a financial set back in regards to what its going to take monetarily to get Project Legend completed but hey, that’s life.
New posts happening more than once a month.
Promise.
Tuesday, April 29, 2008
Thursday, April 17, 2008
It's About Time....
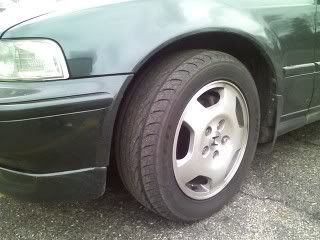
Yep. OEM GS 16's wrapped in some Falken Azenis. I'm pretty happy with them. Especially because of the Honda "H" center caps, although if you look closely; the plastic center cap's grey color does not fully match the aluminum wheels like the "Acura" caps that came on them originally. I guess I’m just anal like that, but they have to be perfect, so I’ll probably replace them at some point when the money’s right.
Actually, I plan on upgrading the whole combo altogether to something bigger/better.
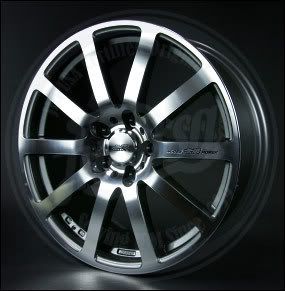
Granted, bigger does not always equal better, but maybe some 17’s of the Mugen NR variety would be nice…
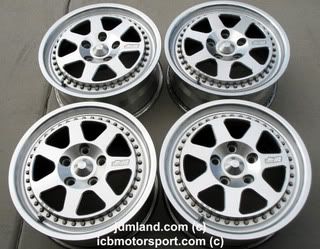
That is, if I cannot find another set of these limited edition M7’s…
(Photo courtesy of Matt at ICB Motorsports.)
Because of the size of the photo, you cannot really see the lettering on the face of the wheel but rest assured, it does say “VIA KA7” right next to the JWL and as such, is made specifically for the KA7 chassis, which would be an ideal choice for Project Legend.
These M7’s however, are uber-rare (as is anything Mugen, much less Mugen/KA7 specific) and when I inquired about the cost of them when Matt posted them on his website, I believe the price was upward of two grand. That kind of money is just as out of my range now as it was then, but still, I’m optimistic as to what the future holds for my “shoe selection” in all its varieties as well as its application in regards to Project Legend.
Thursday, April 10, 2008
She can scan......man.
Here is a sneak peak…..
Now I don't know if or when I do complete this project; that these pics will make it to the blog, but I'll definitely be using pictures out of them for reference in later posts.
Saturday, April 5, 2008
HONDA: Made in Italy?
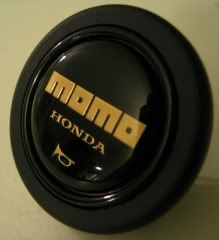
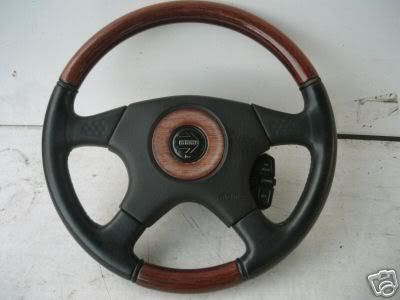
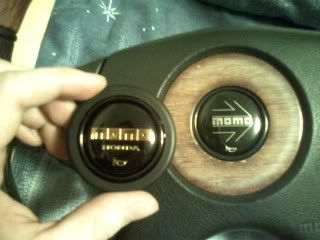
As you can probably see, it is going to replace my existing "MOMO" badged horn button that already exists within the center of my MOMO wheel.
What you may not see, is that this new button that I acquired; now says "HONDA" underneath the "MOMO" and is also in gold lettering.
.......so here is a better picture.
Fresh right? Right.
FYI, this horn button was made for by MOMO for Honda and its limited edition EG6 (92-95 for those of you not up on your chassis code knowledge) Civic steering wheel.
Also, because I'm strongly considering keeping everything on my builds "era-specific," this horn button works out quite nicely because of its original chassis' yearly denomination coincides with the Project Legends' (91-95).
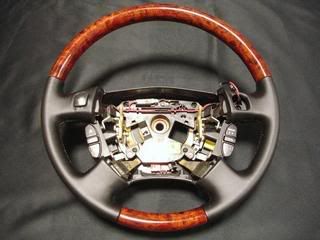
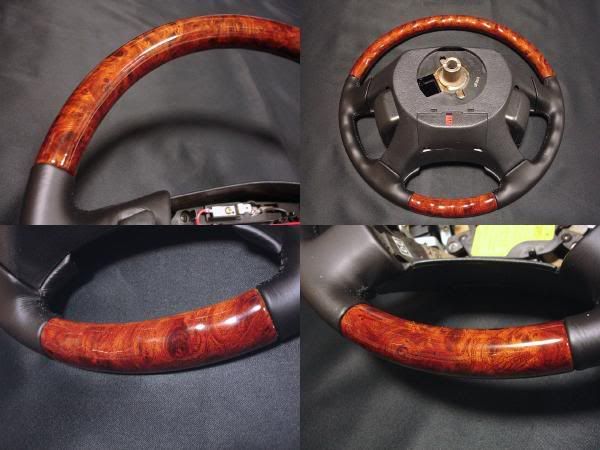
Now that the steering wheel has a properly badged horn button, all I need to do now before installation/replacement of my existing OEM steering wheel, is to replace the center woodgrain trim/garnish. I need to do this because it currently looks like this...
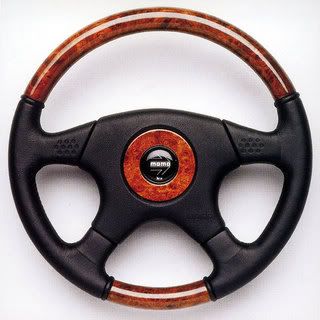
....but I want it to look NEW, like this....
Awhile back, I researched some different places that customized steering wheel's, wood grain garnishes, etc and came across a this company:
www.craftcustoms.com
214-564-1170
892 Steger Towne Rd., #59
Rockwall, Texas 75032
I corresponded with a man named Carter via email and he quoted me $150 plus $15 shipping to do the work. While this price seemed a bit excessive, he assured me it was necessary because it is important that the work is performed correctly as well as it being about a three day process plus color matching the center garnish wood to match the outside wheel-wood.
This has been over a few months ago and I have not been able to go ahead further because of (as always) lack of money.
Thats all for this post. Just an update more or less about another lengthy process thats going to take awhile to reach fruition. When that glorious day DOES come however, I'm sure that I'm going to be pretty happy with the results.
It should be a one of a kind with the EG6 Limited Edition horn button.....
However, it won't be as cool as the official KA7 woodgrain Mugen steering wheel that I am ALWAYS looking for:
......*sigh*........